3D-Printing a Joystick and a Paddle Controller (While Waiting on my C64 Parts)
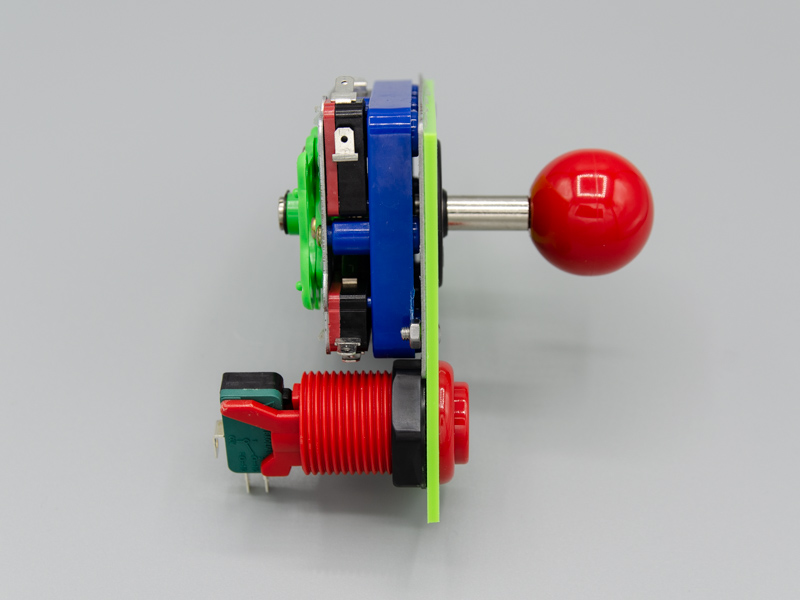
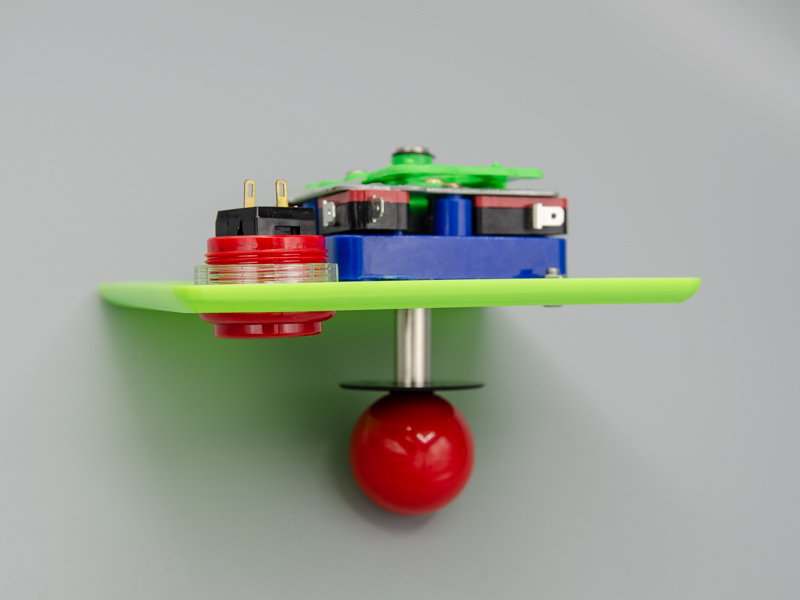
The circuit board and the case for my project to build a Commodore 64 are still in the mail, and while I am waiting for those to arrive in Los Angeles, I started building input devices: a joystick and a paddle controller. Like many other contemporary machines, the C64 uses a DE-9 connector to hook up game controllers. These types of connectors are easy to get as they’re still in use in modern devices, e.g. for RS-232 serial interfaces. A paddle consists of a button and a potentiometer, also easy to obtain. And a joystick is, well, the actual stick assembly (with 4 switches, one for each direction) and a button. Those parts are still made for arcade machines. Lastly, both the paddle and the joystick need to fit into their own enclosures. For those I’ve opted for 3D printing. The result for the joystick is below. It’s a bit bulky but it works, probably—we’ll know for sure once the C64 parts are here.

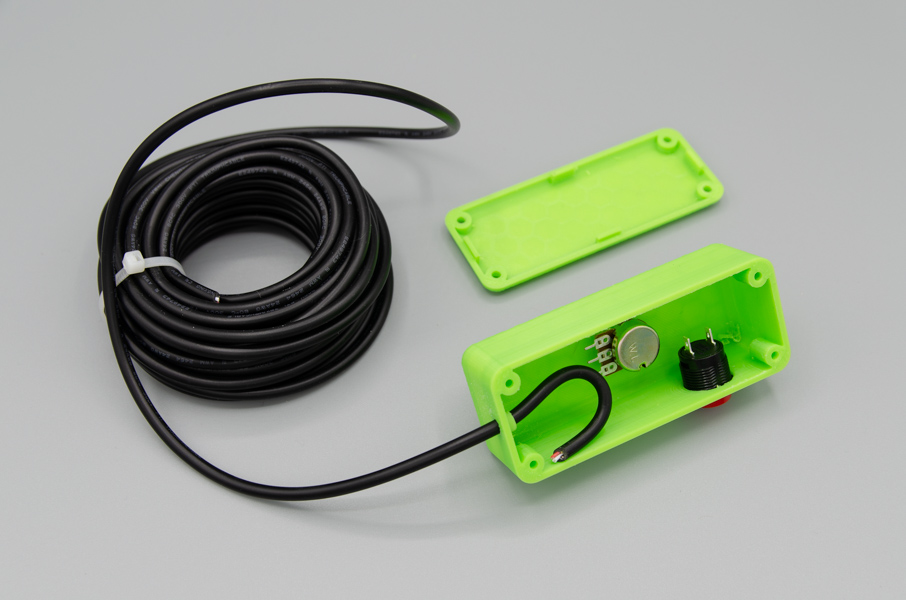
I started by designing a generic parameterizable enclosure in OpenSCAD. The enclosure consists of a main part (chassis) and a lid. The lid is secured by four screws in each corner. There are a number of ways to assemble 3D-printed parts with screws. For this project, I decided to try out the tapping route. Using an M3 tap, I cut threads into the screw hole posts of the chassis and then secured the lid to the chassis using four M3 screws. So far this has been sufficiently sturdy. It took some experimentation to find the right diameter size that, after printing tolerances and inaccuracies come into play, results in holes of the right size for an M3 tap.

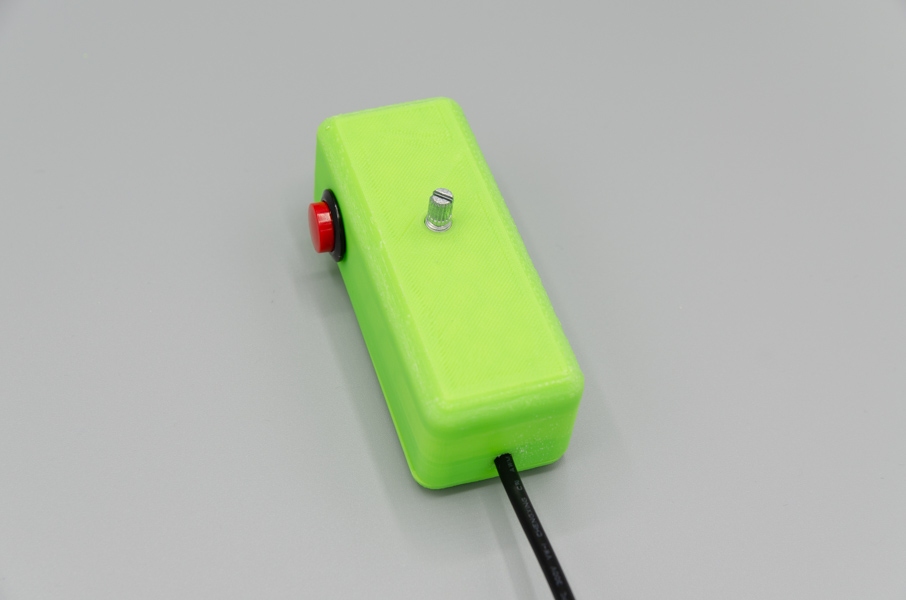
The next step was to design the enclosure for the paddle. For the potentiometer, I added a notch to the enclosure so that it does not rotate when operated. For the button, there’s a hole on the side so that the button can be reached easily with the left thumb. To make sure the components fit, I did a flat test print to estimate the tolerances. It turns out that the tolerances differ between the flat test print (with the button hole flat on the print bed) and the actual part (with the hole in vertical position). That’s somewhat obvious in hindsight, but it didn’t occur to me initially. Printing the hole vertically resulted in a slightly larger opening, so the button fits less snugly (but it stays in place once secured with its nut).

Below are the results of the print. To get the paddle position, the C64 will read the analog voltage over the potentiometer and translate it to a byte value in one of the SID chip’s registers. As a computer engineer, I am a bit skeptical about getting analog signals right on the first attempt. Thus, before fully wiring it up, I want to do a quick breadboard test to make sure everything works as expected. Lastly, the paddle still needs a proper knob for the pot. The ones that came with it look a bit too “industrial,” so the plan is to print a custom one.


For the joystick, I’ve used the same enclosure with different measurements. For the button there is a similar cutout in the chassis (but in horizontal position instead of the vertical one in the paddle enclosure). There are four mounting holes that match the holes of the mounting plate of the joystick assembly. In addition, the wall thickness above the mounting plate is thicker so that the heads of the mounting screws can be recessed more deeply into the plastic. Those screws are then secured with nuts on the inside of the enclosure. To accommodate the hole sizes in the mounting plate of the joystick assembly, I’ve used slightly larger M4 screws and corresponding nuts.

The stick and button I planned to use initially are both sold by Sparkfun. One problem with the arcade button in Sparkfun’s catalog is that it is very long and would have required an even bulkier enclosure for the joystick. I ordered a more compact button (made by Crown/Samducksa) from Focus Attack, which allows the enclosure to have significantly less height (see comparison below).


Printing the joystick enclosure took about 2 hours for the lid and 7 hours for the chassis. There are likely some optimizations I could do to get this sped up—I’m still a 3D printing newbie. The parts did not come out perfectly, e.g. the lid has blemishes in the corner where the cable connects, but everything is otherwise functional. Time will tell if the tapped screw hole design is robust enough to withstand the flexing and other stresses on the enclosure during play.

The last step was to get the joystick wired up. In contrast to the paddle, the joystick is a purely digital design (the fire button switch and the switches for the four cardinal directions, up/down/left/right, short their respective lines to ground). The wiring will need some tidying up and some cable management to avoid the wires interfering with the stick mechanism, which I’ll do after having done a test drive once the C64 is assembled.

Instead of building controllers from parts, there are other options to connect input devices to a C64. A modern USB game controller can be connected using a microcontroller. This can be done with an Arduino, for example. Another option is to get a joystick with a DE-9 connector. Individual Computers sells the Competition Pro Retro, a newly made version of the legendary Competition Pro joystick.
➤ Other C64 posts:
- A VIA for the Commodore 64: Revised PCB
- Getting my VIA Expansion to Work with the Commodore 64
- A Modern VIA Connected to a Commodore 64
- Writing a Commodore 64 Game in the 2020s: a Retrospective
- Small Cab Hustle Update
- Now with Sound: Cab Hustle for Windows
- Porting my Commodore 64 Game to Windows
- Cab Hustle is Now on Itch.io
- Cab Hustle is Now Available!
- Cab Hustle: The Latest on my C64 Game
- Recent Progress on “Cab Hustle”
- Cab Hustle: My New Game for the Commodore 64
- C64 Build Video
- 6502 Scripting: a Tcl Shell on the Commodore 64
- Assembling my Commodore 64
- Finishing the 3D-Printed Paddle Controller
- Ultimate 64
- Building a Commodore 64
Subscribe via RSS